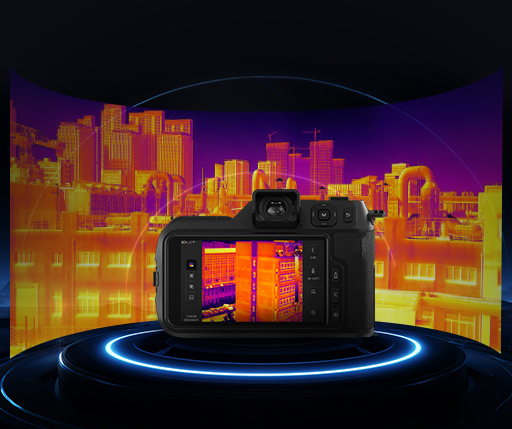



How to Use the Thermal Camera for Home Energy Inspections


A home may look comfortable from the inside while losing a large amount of heat through windows, doors, walls, roofs, and other building components. A visual inspection alone cannot always reveal where heat is escaping or entering the home.
Thermal imaging technology offers a way to quickly identify temperature differences on building surfaces. By scanning interior and exterior surfaces, inspectors can find cold areas, hot areas, missing insulation, thermal bridges, and possible air leakage points.
A thermal camera does not directly measure energy consumption. Instead, it shows surface temperature patterns that can help explain where a building may be gaining or losing heat.
Check Windows and Doors for Heat Loss
Windows and doors are common areas for unwanted heat transfer. Poorly insulated frames, damaged seals, gaps, and single-glazed windows can create noticeable temperature differences.
During a home energy inspection with a thermal camera, scan the entire window area rather than checking only the glass. Compare the temperatures of the window center, edges, frame, surrounding walls, and nearby areas.
Low temperatures around the window frame may indicate poor insulation or air leaks. In winter, indoor surfaces near a poorly sealed door may appear colder than the surrounding wall. In summer, the opposite pattern may occur when hot outdoor air or solar heat affects the building envelope.
Thermal imaging can help homeowners identify which windows or doors deserve closer inspection before replacing them.
Find Heat Loss Through Walls
Walls can hide insulation problems that are difficult to see during a normal inspection. A thermal camera for building energy inspection can show temperature differences across wall surfaces.
Under stable environmental conditions, if a specific section of a wall is significantly cooler or warmer than the surrounding area, this temperature pattern may indicate missing, compressed, or unevenly distributed insulation. Large temperature differences can also appear around wall penetrations, corners, electrical outlets, and connections between different building materials.
However, temperature differences should not be regarded as definitive proof of insulation defects. Furniture, sunlight, indoor airflow, moisture, and heating or cooling systems can also affect surface temperature.
For better results, inspectors should scan similar wall sections and look for consistent patterns.
Inspect Roofs and Ceilings
The roof is another important part of a home's thermal envelope. Poor roof insulation increases heat transfer between the indoor and outdoor environments, which can increase heating and cooling demand.
From inside the house, thermal imaging can be used to scan ceilings and attic areas. The thermal patterns revealed in the images help identify locations where insulation is weak, missing, displaced, or unevenly distributed.
Roof inspections from outside can also provide useful information, but weather conditions are important. Solar radiation, wind, rain, and surface materials can affect the thermal pattern.
For this reason, a thermal imaging roof inspection should be performed under suitable conditions and interpreted together with information about the roof structure and insulation system.
Detect Problems with Insulation
Effective insulation helps slow the transfer of heat between indoor and outdoor environments. When insulation is properly installed, the building envelope generally shows more consistent thermal patterns.
Thermal imaging helps locate areas where insulation performance differs from that of the surrounding structure. For example, a narrow cold strip inside a wall may indicate an insulation gap, while a larger irregular pattern may suggest uneven insulation coverage.
This makes thermal imaging suitable for both existing homes and renovation projects. Inspectors can use thermal patterns to identify areas requiring further investigation without the need to immediately open up the walls.
Still, thermal imaging detects surface temperature, not insulation thickness or insulation R-value. Physical inspection may be needed to confirm the exact condition of the insulation.
Identify Thermal Bridges
A thermal bridge is an area where heat moves through a building envelope more easily than through the surrounding insulated structure.
Common locations for thermal bridges include wall corners, concrete connections, structural elements, window frames, balconies, roof connections, and junctions between different materials.
Depending on the direction of heat flow and the inspection conditions, thermal bridges may appear as localized areas or linear patterns with different surface temperatures from the surrounding structure.
Inspecting residential buildings for thermal bridges helps identify areas of the building envelope with poor thermal insulation performance. Detecting these areas early facilitates the implementation of insulation improvements and helps reduce unnecessary heat transfer.
Thermal bridges can also contribute to surface condensation when indoor humidity and temperature conditions are suitable, so unusual cold areas may deserve additional moisture or building-envelope inspection.
Locate Potential Air Leakage
Air leakage is another source of building heat loss. Small gaps around windows, doors, attic openings, vents, and service penetrations can allow conditioned air to escape.
Thermal imaging can help locate potential air leakage paths by revealing temperature patterns associated with air movement. Thermal images are easier to interpret when there is a sufficient temperature difference between the indoor and outdoor environments.
To improve the accuracy of air leakage detection using thermal imaging, inspectors may combine the use of a thermal camera with a blower door test. The pressure differential created by the blower door makes leakage points easier to identify.
The information provided by this combined approach is far more comprehensive and practical than using a thermal camera alone.
Use Thermal Imaging to Understand Building Heat Loss
In residential energy efficiency inspections, the primary value of thermal imaging lies not merely in identifying unusually warm or cool areas, but in understanding how heat transfers through the building envelope.
Inspectors can conduct comparative analyses of windows, doors, walls, ceilings, roof sections, corners, and other structural junctions. These comparisons can reveal patterns that may explain high heating or cooling demand.
After the inspection, homeowners can prioritize improvements based on the most significant problem areas. Possible actions may include improving window seals, repairing insulation, sealing air leakage points, or addressing thermal bridges.
Conclusion
Thermal imaging is a practical tool for assessing residential energy efficiency, as it quickly reveals surface temperature differences that are not visible to the naked eye. This technology enables the identification of potential heat loss around doors, windows, walls, roofs, insulation, thermal bridges, and air leakage points.
However, smartphone thermal cameras cannot directly measure a home's energy efficiency. Temperature patterns should be interpreted together with weather conditions, building materials, indoor and outdoor temperatures, and other inspection results.
When used correctly, thermal imaging for home energy inspections can provide a clear visual starting point for finding building-envelope problems and deciding where further investigation or energy improvements may be needed.
.jpg)